If you fish long enough, you are eventually going to break a rod tip. Whether it’s a bent guide, a missing insert, or a snapped tip, it’s an unfortunate reality of the sport. Luckily, fixing a broken tip is an easy and cost-effective task that can even be done on the water. In this Tackle Warehouse DIY article, we’ll go through four easy steps to replace it and be ready to get back on the water in the blink of an eye.
Gone are the days of waiting weeks for you to get your favorite rod’s tip patched up by the manufacturer or repair shop, in just a few minutes you can go from temper tantrum to casting a line in search of that next trophy fish.
Keep scrolling for step-by-step instructions!
Items Needed:
–Replacement Rod Tip
-Heat Source
–Pliers
–Hot Melt Glue
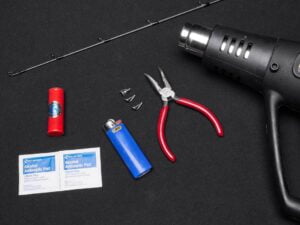
Suggested products:
Step One: Remove Damaged Tip
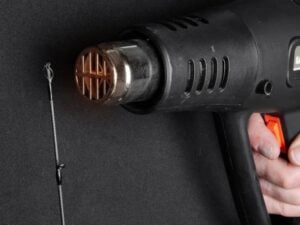
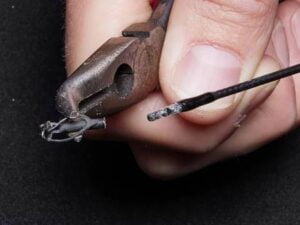
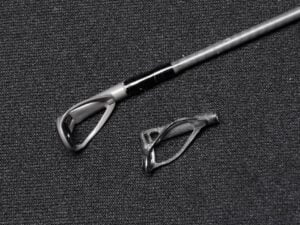
If you are replacing a damaged tip, you will first need to remove it and expose the underlying section of the blank. Using your preferred heat source, heat the tube of the top guide for several seconds to loosen the glue, allowing you to pull it free from the rod with pliers or forceps. Take care not to expose your rod to direct flame or overheat the blank as it can cause severe damage. Additionally, use caution here and rely on your tools, as you do not want to burn your fingers by grabbing the hot guide.
Once you expose the tip of the rod blank give it a wipe with an alcohol pad or clean rag to remove any dirt or debris from the tip, ensuring a strong bond between the glue and your new tip.
Step Two: Choose Your New Guide
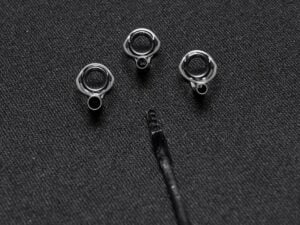
Many rod repair kits will come with three top guides varying in size. You can simply try each guide to find the one that fits snuggly on your rod. If you are purchasing individual tips, it can be helpful to use calipers to determine the diameter of your rod’s tip to best match with the corresponding tube bore diameter listed on the product’s webpage.
Step Three: Apply Glue to Tip and Tube
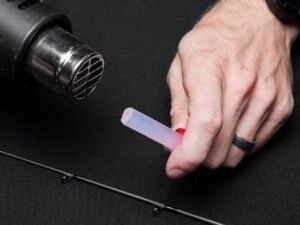
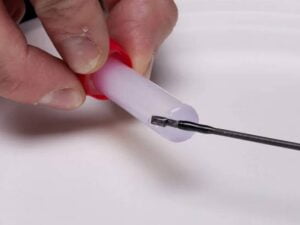
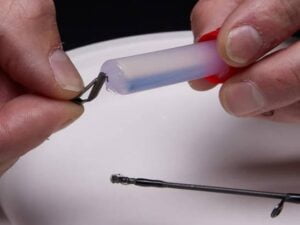
Glue is needed to affix your guide to the rod securely. While some anglers prefer to use super glue for a permanent hold, most will elect to use a hot melt style glue in the event they need to replace their tip top again down the road. Soften your hot melt glue by heating it up with a lighter, heat gun, or another heat source, and apply a small amount around the blank’s tip as well as the interior of the guide tube.
Step Four: Apply New Rod Tip
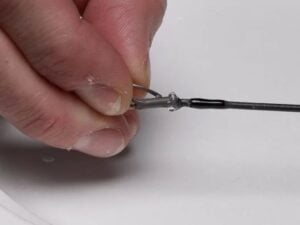
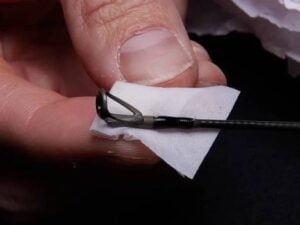
To complete the process simply press the glue-filled guide down over the tip of the rod and align it with the rest of your guide train. You may need to apply additional heat to soften the glue and work the tip top into the fully seated position. Once your new tip is on, a quick wipe with an alcohol swab or clean cloth to remove any excess glue completes the repair job.
While breaking a rod tip may seem like a nightmare scenario, it’s not one that should keep you up at night. With a few basic supplies and just a short amount of time, you can have your favorite fishing rod back in “tip top” shape and ready for more action!

Check out all the others Tackle Warehouse DIY Tutorials!
- Tackle Warehouse DIY: Best Tournament Accessories
- Tackle Warehouse DIY: Top Soft Stick Bait Modifications
- Tackle Warehouse DIY: Best Spinnerbait Hacks
- Tackle Warehouse DIY: Best Bass Fishing Boating Accessories
- Tackle Warehouse DIY: Must-Have Fishing Storage for Home
- Tackle Warehouse DIY: How-to Dye Braided Line
- Tackle Warehouse DIY: Best Paddle Tail Swimbait Modifications
- Tackle Warehouse DIY: How To Store Hardbaits
- Tackle Warehouse DIY: Top 5 Jig Modifications

