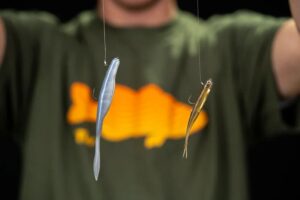
A smart solution to the challenge of targeting suspended fish and pressured fish alike, the Hover Strolling Rig is a brilliant finesse technique out of Japan that methodically presents your preferred soft plastic perfectly horizontal. Often paired with fluke-style minnows or other soft jerkbaits, the highly effective Hover Strolling Rig can turn finicky and highly pressured fish into biters when nothing else will.
To get started setting up your prolific Hover Strolling Rig, you will need an ultra-finesse 90-degree hook, a small nail weight, and your preferred soft plastic. Keep scrolling for step-by-step instructions below!
What’s Needed:
Step One: Tie Hook On
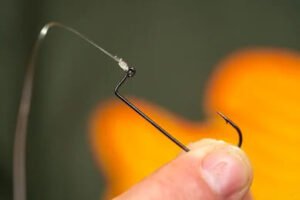
 While the order of operations can vary based on angler preference, most often rigging a Hover Strolling setup starts with tying your mainline, or leader if applicable, to your specialized hook. The finesse hook needs to have a 90-degree line tie in order to orient your plastic in a natural, horizontal position. Most often these small hooks that match your bite-sized plastic will range in size from a #4, all the way down to a #10. Simply use any of your favorite terminal knots to affix your hook such as the Palomar, San Diego Jam, Clinch Knot, or others.
Step Two: Thread Soft Plastic onto the Hook
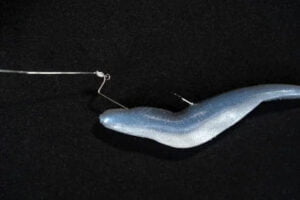
 Once your hook is securely fastened to your fishing line, it is time to add your finesse soft plastic. Rather than going directly through the nose like most rigs, you will need to insert the hook point 1/8 – 1/4 of an inch behind the head or nose of the bait and thread it through until the plastic is approximately halfway up the shank of the hook. Next, you will expose the hook point in the center of the bait’s back before you finish embedding the hook completely. Positioning the hook’s eye slightly behind the head or nose of the bait not only keeps the presentation horizontal but it also helps to impart a spiraling action on the fall.
Step Three: Add Weight
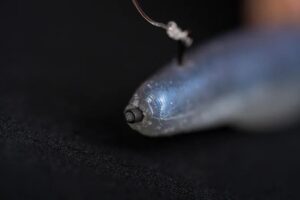
 The final component of the Hover Strolling Rig is your nail weight. While tungsten offers a compact profile and increased sensitivity, lead is very easy to cut with scissors for a customized fit. Grab your tungsten or lead nail weight and insert it into the nose of your bait. Leaving a small portion of the weight exposed boosts sensitivity while also adding an acoustic layer to your presentation when it knocks into rocks or other hard structures. Conversely, some anglers prefer to fully insert the weight and apply heat to the plastic to get it to seal closed over the weight, ensuring the weight does not fly out on the cast.
Easy to rig, incredibly effective, and often under-utilized, the Hover Strolling Rig is the ultimate tool for overcoming a tough bite!
Check out also the Tackle Warehouse DIY Tutorials!
- Tackle Warehouse DIY: How-To Store Umbrella Rigs
- Tackle Warehouse DIY: How-To Change Blades
- Tackle Warehouse DIY: Best Bass Fishing Rod Modifications
- Tackle Warehouse DIY: Best Bass Fishing Storage Accessories
- Tackle Warehouse DIY: Top 5 Fishing Tools
- Tackle Warehouse DIY: Best Tournament Accessories
- Tackle Warehouse DIY: Top Soft Stick Bait Modifications
- Tackle Warehouse DIY: Best Spinnerbait Hacks
- Tackle Warehouse DIY: Best Bass Fishing Boating Accessories
- Tackle Warehouse DIY: Must-Have Fishing Storage for Home
- Tackle Warehouse DIY: How-to Dye Braided Line
- Tackle Warehouse DIY: Best Paddle Tail Swimbait Modifications
- Tackle Warehouse DIY: How To Store Hardbaits
- Tackle Warehouse DIY: Top 5 Jig Modifications
- Tackle Warehouse DIY: How-To Replace a Rod Tip
- Tackle Warehouse DIY: How-To Clean Cork Handles


