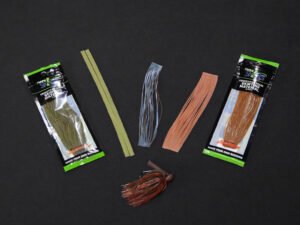
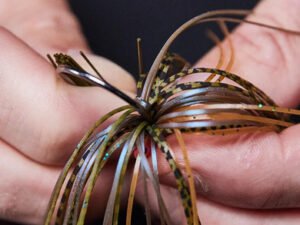
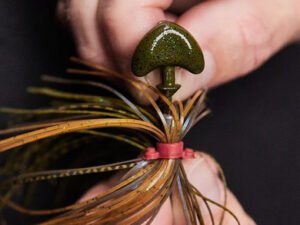
Whether you’re trying to maximize your fishing budget or restore a chewed-up jig to its original condition, knowing how to make and change out a jig skirt is an essential skill for all anglers to have in their bag of tricks. It’s a quick and simple task that can be done on the fly, and more importantly, can be the difference between a bass passing on yet another basic green pumpkin jig or a big bite on your custom creation! In this Tackle Warehouse DIY article we’ll explain how this easy task is done. Keep scrolling for step-by-step instructions!
Changing out a jig skirt is a quick and simple task that can be done on the fly. In this Tackle Warehouse DIY article we’ll explain how it’s done with step-by-step instructions.
Items Needed:
– Skirting Material
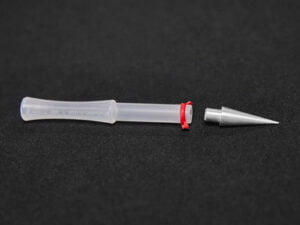
– Skirt Making Tool
– Skirt Bands
– Scissors
– Your Favorite Jig
Suggested Items:
- Skirts Unlimited Solid Color With Flake Skirts 10pk
- Skirts Unlimited Rattle Bands 100pk
- Skirts Unlimited Skirt Making Tool
- BOSS Gary Klein’s Original Flipping Jig 4pk
- Cuda 8″ Titanium Bonded Detachable Marine Shear
- Hareline Plastic Jig Rattles 10pk
- All Terrain Skirts Barbwire Skirting Material 20pk
- BOSS Brent Ehrler Gamakatsu Flipping Jig Head 3pk
- Decoy Silicone Gripper Bait Rigging Accessory 18pk
- Andy’s Custom Bass Lures Old School Flat Cut Rubber
- Hareline Krystal Flash
- Skirts Unlimited Mickey Mouse Rattle Band 50pk
- All Terrain Tackle Jig Rattle Straps
- Dobyns Weedless Football Jig Heads
- Do-it Bucktail
- Dirty Jigs Replacement Skirts 50 Strand 5pk
Before you begin the process, you will need to choose your skirt material and volume. Skirting materials come in a wide selection of colors, patterns, and textures, so play around with different types, find the ones that work on your fishery, and stock up. Once you have landed on a skirt material, you need to decide how much of it to use, which in turn determines the bulk of the profile.
Most premade jig skirts come out of the packaging with 40 to 60 strands of skirting and most skirting material is sold in 20-strand tabs. For a thin, active skirt try using one or two tabs, for a bulkier, slow-flowing skirt try using three (occasionally even four) tabs of skirting.
Step Two: Choose Skirt Band
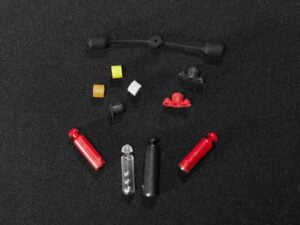 Next, choose the type of skirt band that you want to hold the skirt tabs together. Skirt bands come in a number of different colors and two different types – regular and rattling. Rattling skirt bands are molded with two circular appendages, which are made to hold a rattle.
Rattles can be added to the jig once the skirt is complete, should you decide to add an acoustic element to your presentation. After you have landed on the color and type of skirt band you want to use, the next step is to combine the skirt band and tabs of skirting material.
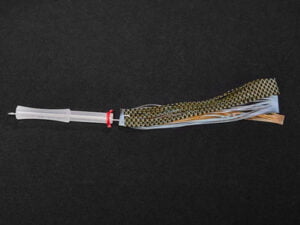
To combine the skirt band with the tabs of skirting we are utilizing the Skirts Unlimited Skirt Making Tool. To start, thread the rubber skirt band onto the tapered metal tip of the tool until it rests on the end of the plastic body, then remove the metal tip. Slide the hooked metal wire through the hollow body of the skirt making tool, then lay the ends of the skirt tab onto the hook. Pull the skirting almost halfway back through the tube, then slide the rubber skirt band back down around the skirting.
Complete the creation of your skirt by trimming off the tab ends to free your silicone or rubber skirt strands. Once your strands are freed and fluffed out a bit, you are ready to add your custom skirt to your jig head!
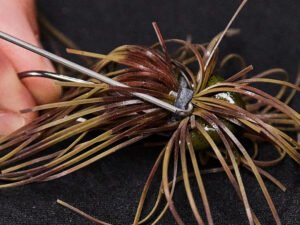
If you’re replacing a worn-out skirt, you will need to first remove the old skirting material by pulling the band off or snipping the hand-tied skirt free from your jig head. If you will be creating a new jig from scratch just grab your jig head and skirt and jump to the next step!
To add the skirt onto your jig, insert the hook point into the center of the skirt and thread it through up past any keeper systems and over the jig’s molded collar. You can then trim the skirt to your desired length for the perfect, tailored presentation.
Step Seven: Add Rattles
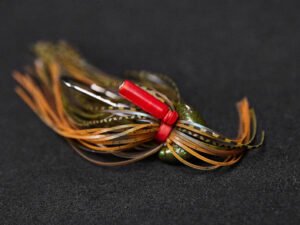 If you elected to utilize a rattle band and looking to add an acoustic layer to your craw-imitating presentation, you can complete your jig by adding a pair of plastic jig rattles. Jig rattles have a small anchor at their top that simply needs to be fed through the rattle collars on your new skirt’s band.
Whether you’re looking for a bulky skirt for deep, cold water jig fishing, or a light, flowing skirt for your favorite chatterbait, the size and color profiles are only limited by your creativity when you start making your own jig skirts.
Perfect for the tournament angler seeking that unique color combination that sets their jig apart from the pack, or the weekend warrior trying to catch their new personal best on a home-cooked creation, knowing how to build and exchange jig skirts is an invaluable asset to have in your angling-knowledge arsenal.

Check out all the others Tackle Warehouse DIY Tutorials!
- Tackle Warehouse DIY: How-To Store Umbrella Rigs
- Tackle Warehouse DIY: How-To Change Blades
- Tackle Warehouse DIY: Best Bass Fishing Rod Modifications
- Tackle Warehouse DIY: Best Bass Fishing Storage Accessories
- Tackle Warehouse DIY: Top 5 Fishing Tools
- Tackle Warehouse DIY: Best Tournament Accessories
- Tackle Warehouse DIY: Top Soft Stick Bait Modifications
- Tackle Warehouse DIY: Best Spinnerbait Hacks
- Tackle Warehouse DIY: Best Bass Fishing Boating Accessories
- Tackle Warehouse DIY: Must-Have Fishing Storage for Home
- Tackle Warehouse DIY: How-to Dye Braided Line
- Tackle Warehouse DIY: Best Paddle Tail Swimbait Modifications
- Tackle Warehouse DIY: How To Store Hardbaits
- Tackle Warehouse DIY: Top 5 Jig Modifications
- Tackle Warehouse DIY: How-To Replace a Rod Tip
- Tackle Warehouse DIY: How-To Clean Cork Handles


